Tutorial: Civic Digits
Description
VizBlocks collaborated with the Civic Digits theatre company to create a series of workshops for school children. This tutorial goes through the basic set up for the workshops
Intro
This tutorial goes through the basics of how to set up and use the Civic Digits VizBlock toolkit. You should have the following items in your kit:
Kit Contents
- 3 x Servo (motor) VizBlocks
- 2 x LED ring VizBlocks
- Raspberry Pi with Civic Digits software pre-installed
- Raspberry Pi power adapter
- USB WiFi adapter
You will also need a computer and webcam, or a computer and a phone with a camera.
Getting Started
Setting up the Raspberry Pi (VizBlocks Server)
- Plug the USB WiFi adpater into one of the Pi’s USB ports.
- Power up the Raspberry Pi. It doesn’t have an on/off switch so it will power on as soon as it is plugged in.
- If the Raspberry Pi has been configured to connect to the same WiFi network as the computer you’re using then skip to thew next step. Otherwise you should connect your computer (and phone, if using) to the VizBlocks network using the password dataisfun.
- On your computer, navigate to the following page https://raspberrypi.local:1880/. You will probably be presented with a security warning. Don’t worry about the warning, it’s just because the security certificate on the Pi was generated locally, so the browser doesn’t know if it’s trustworthy - but we do, because we made it :). To bypass the warning om Safari, click show details then visitthiswebsite. In Chrome, with the browser tab open, you can type thisisunsafe. You won’t see the text being typed anywhere, but when you finish it should let you into the website.
- You should now see a webpage that looks something like this:
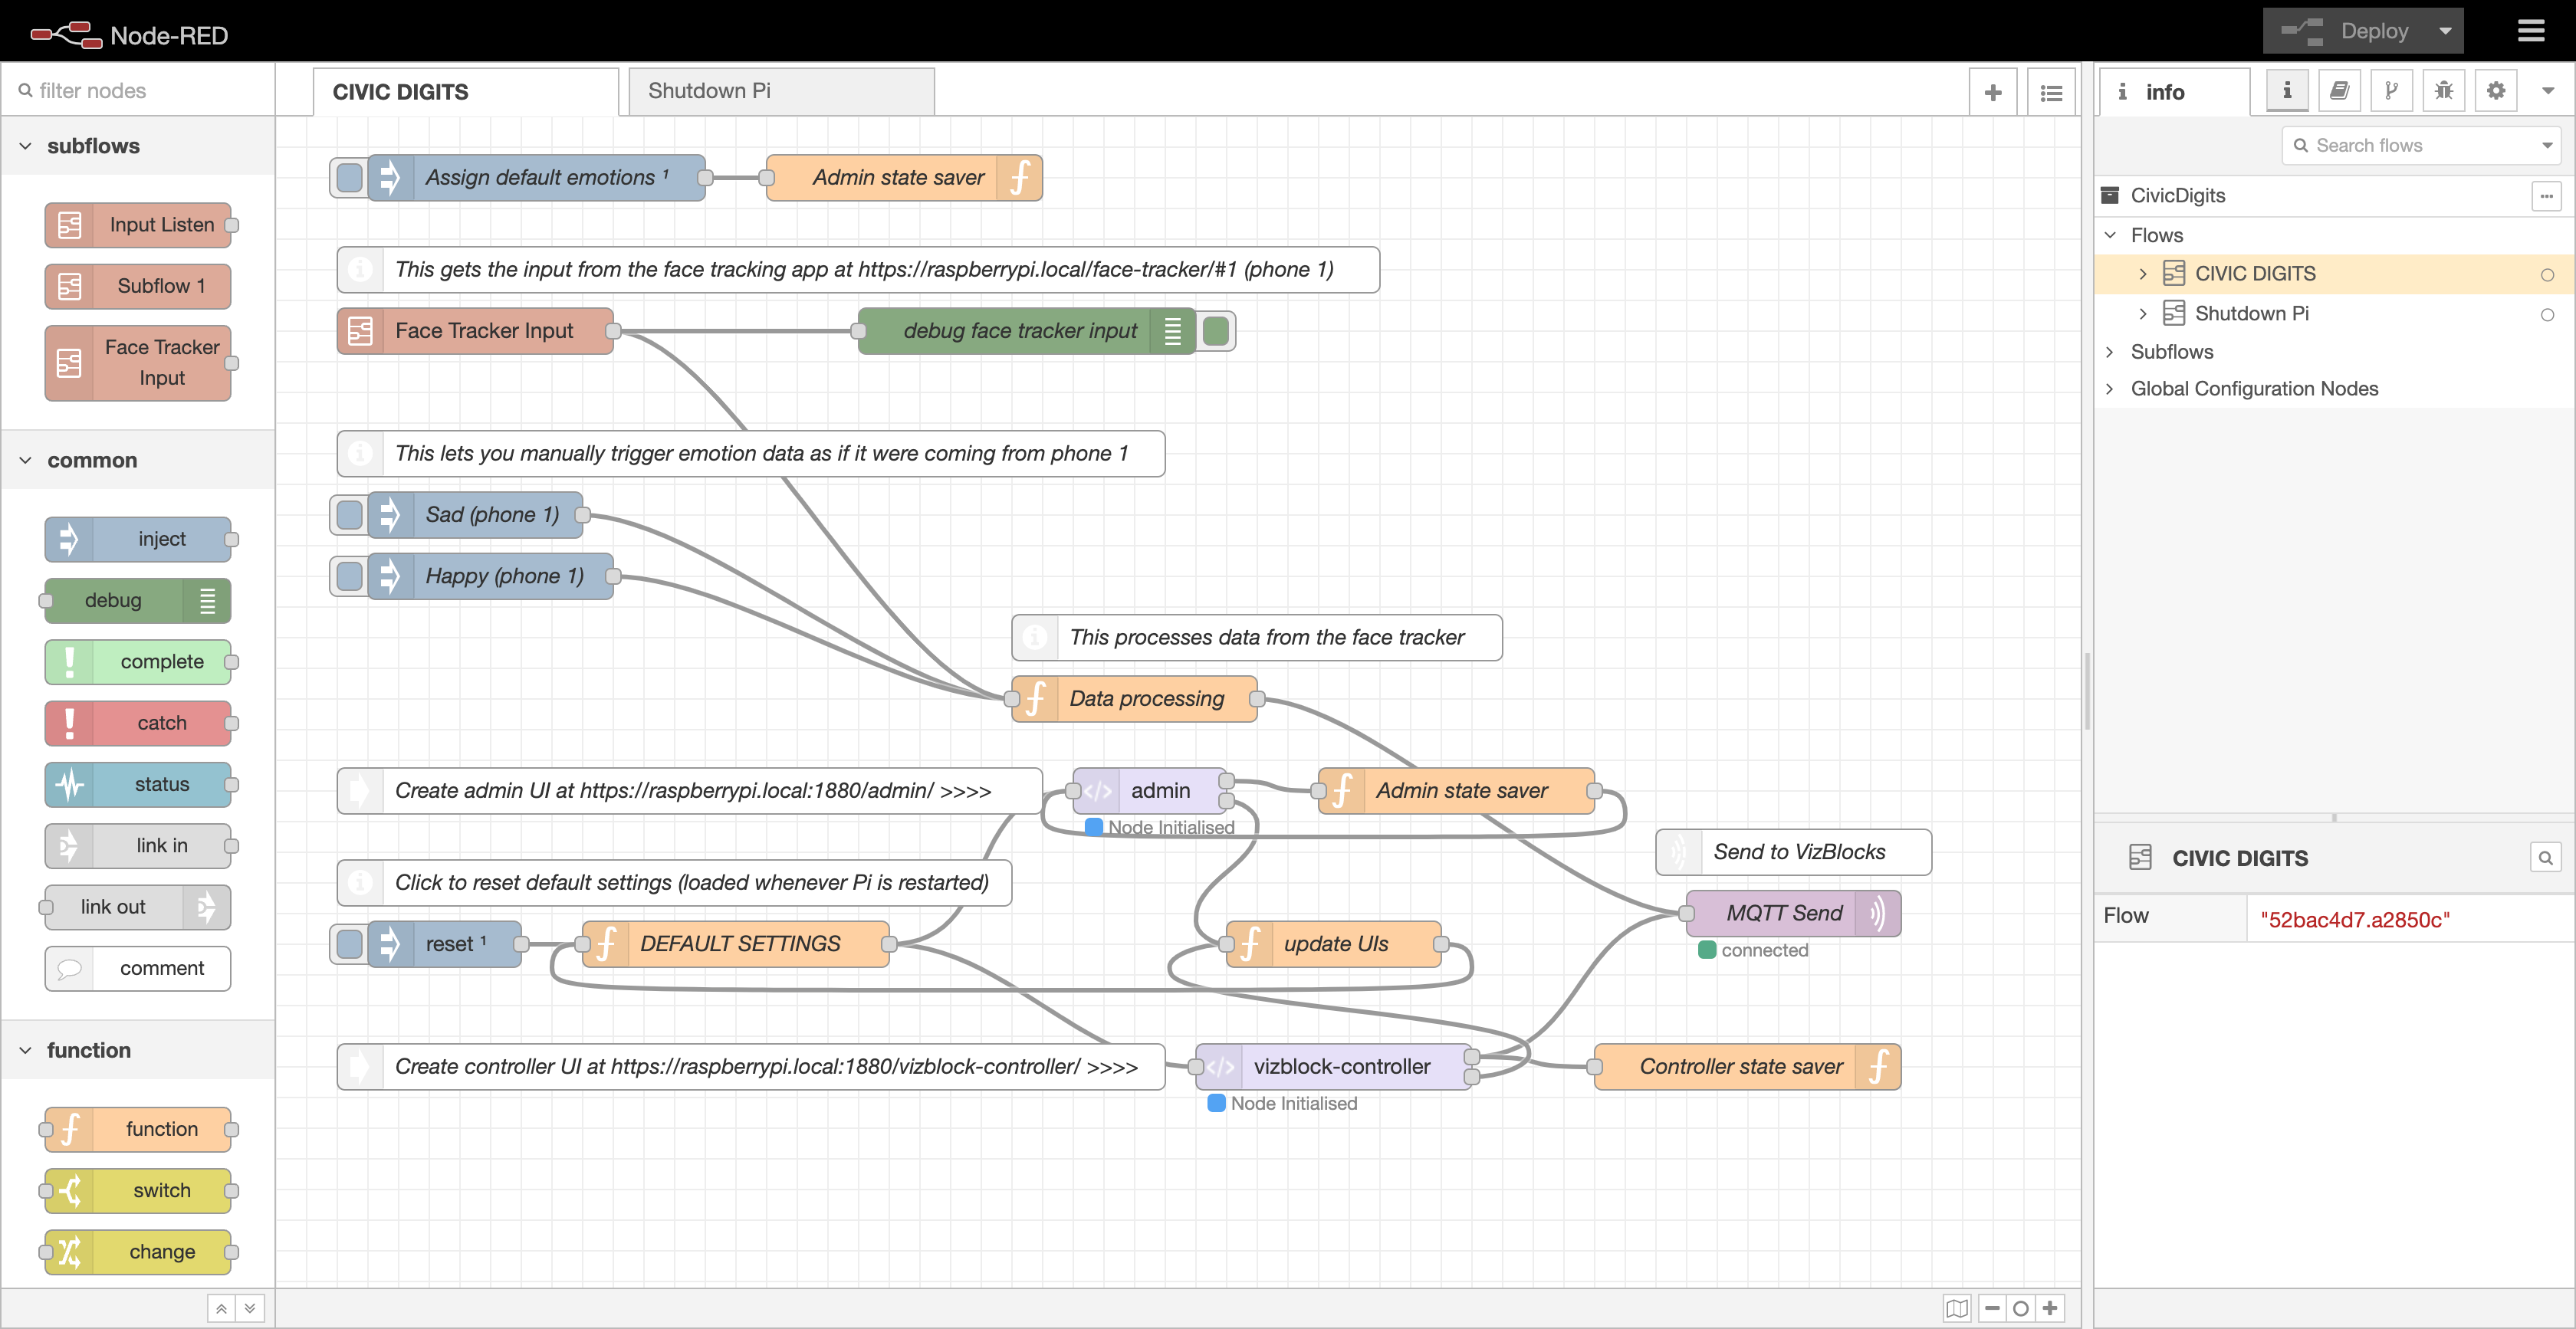
- This is Node Red - the software that controls the VizBlocks. Each little coloured rectangle is called a node. It may look a bit daunting, but hopefully it will become familiar as you learn more throughout these tutorials.
- Next we’ll set up the face tracking app. Note: the device that you use for this must be connected directly to the VizBlocks WiFi network. On your computer or phone go to the following web page - https://192.168.4.1/face-tracker/. You might get the same security warning as before. If so, follow the same steps to bypass the warning. If the browser asks for permission to access your camera then say yes. You should now see the live video from your camera, and a white button at the bottom of the screen, which says START!
Setting up the VizBlocks
- Make sure the blocks are charged. If you turn the block on, you should be able to see at least one red LED just inside the block, below the charging socket. There is a strip of 4 battery level indicator LEDs, with each representing 25% charge. So if all 4 are lit then the battery level is 75-100%, and if only 1 is lit the battery level is 0-25%. The blocks can be charged using a micro usb cable and USB power source. In order for them to charge you will need to turn the blocks off, which can be done by sliding the small power switch to the left (if looking down on the transparent bottom side of the block). The blocks will charge faster if the Raspberry Pi is off, because this will cause the blocks to go into a low power mode. When charging, one of the red battery indicator LEDs should flash. If you don’t see a flashing LED then try a different power source - we recommend using one that provides at least 2 Amps of output power.
- Make sure the Raspberry Pi is on, then turn each of the blocks on. A blue LED should be visible inside the block. Once the blue LED starts flashing, this means it has successfully connected to the VizBlocks Server, and you’re ready to go!
Testing the set up
We’ll now do a basic test to see if the Raspberry Pi and VizBlocks are communicating correctly.
- Go back to your Node Red web page at https://raspberrypi.local:1880/.
- Look for the two blue nodes pictured below:
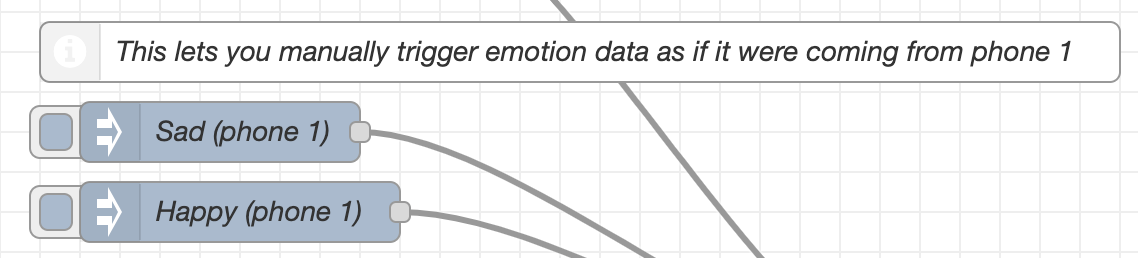
- These blue nodes with the right pointing arrow are inject nodes - they let you inject an input to the software. You can trigger the input manually by clicking the small blue square to the left of the node. Try triggering the happy and sad emotions. You should see the blocks responding: the LED blocks will go orange for happy, and half blue for sad; and the motors on the servo blocks will change their angle.
Introducing the Control and Admin interfaces
Within Node Red there are two nodes with a </> symbol on them, called admin and vizblock-controller. These nodes are used to create user interfaces, which provide a more user-friendly way to control and configure Node Red and the VizBlocks. We won’t go into the detail of how these nodes work (yet) but let’s learn a bit more about the interfaces.
Admin Interface
The admin interface is designed for workshop supervisors and can be accessed at https://raspberrypi.local:1880/admin/. Click on Face 1 and you should see a set of options like the image below.
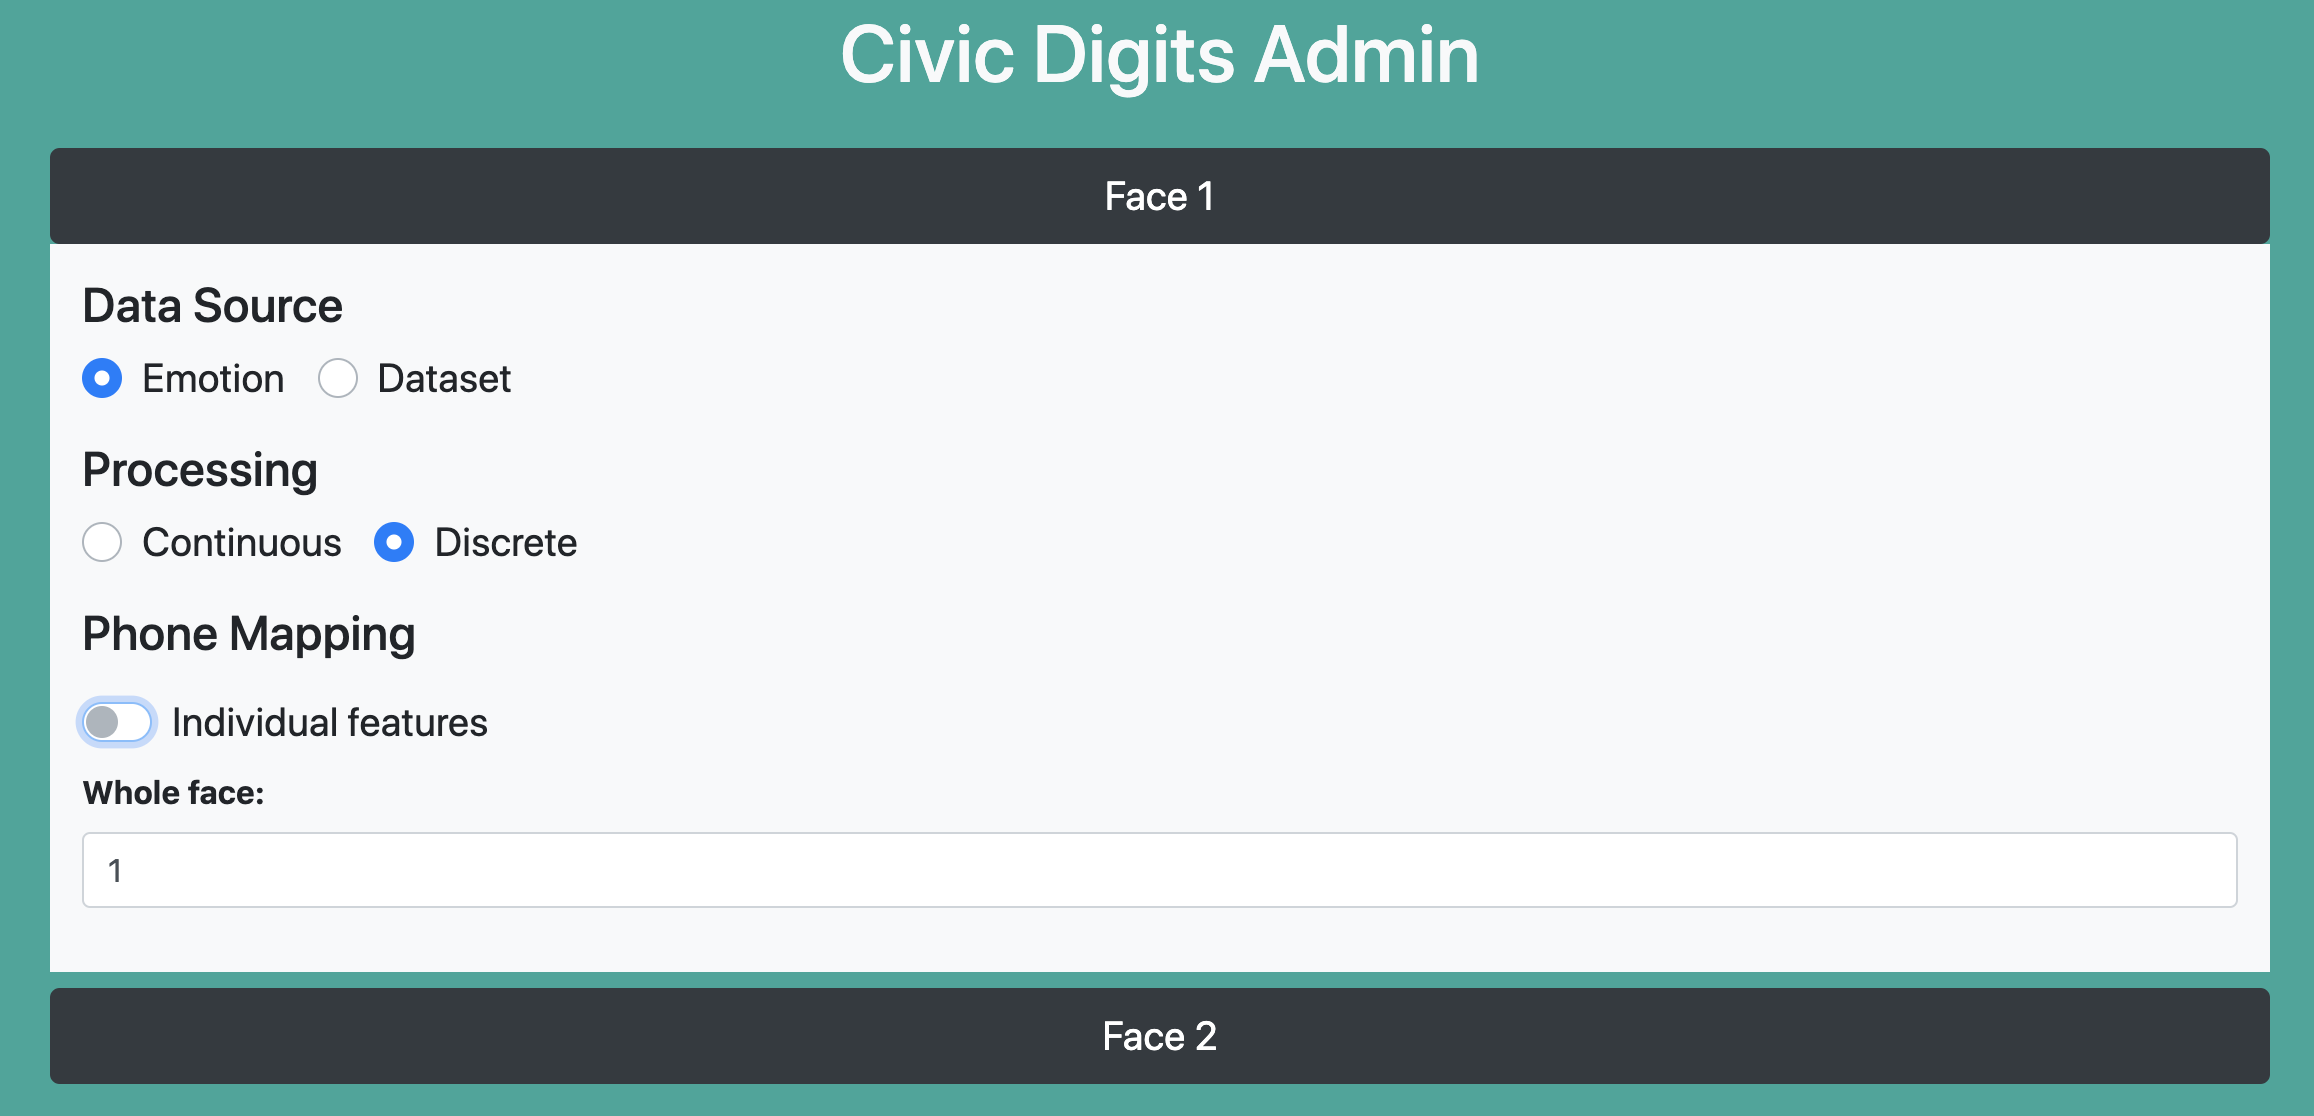
- Under Data Source you can choose to have the VizBlocks either controlled by emotions (from the face tracker), or by data (from the datasets).
- Under Processing you can decide whether the responses to the data are continuous or discrete. For example, a discrete reaction would mean that the servo blocks would move to one angle for sad and another for happy, with no in-between angle. In continuous mode the blocks will respond to the degree of sadness or happiness.
- When you are using multiple phones to gather emotion data from the face tracking app, Phone Mapping lets you choose which phone should control the blocks. Alternatively, if you turn on the individual features button then different phones can be assigned to each facial feature.
Control Interface
The control interface is designed for pupils to access from their phones, and can be found at https://raspberrypi.local:1880/vizblock-controller/. Once the interface has loaded, you can select a VizBlock by its name (engraved on the base of the block).
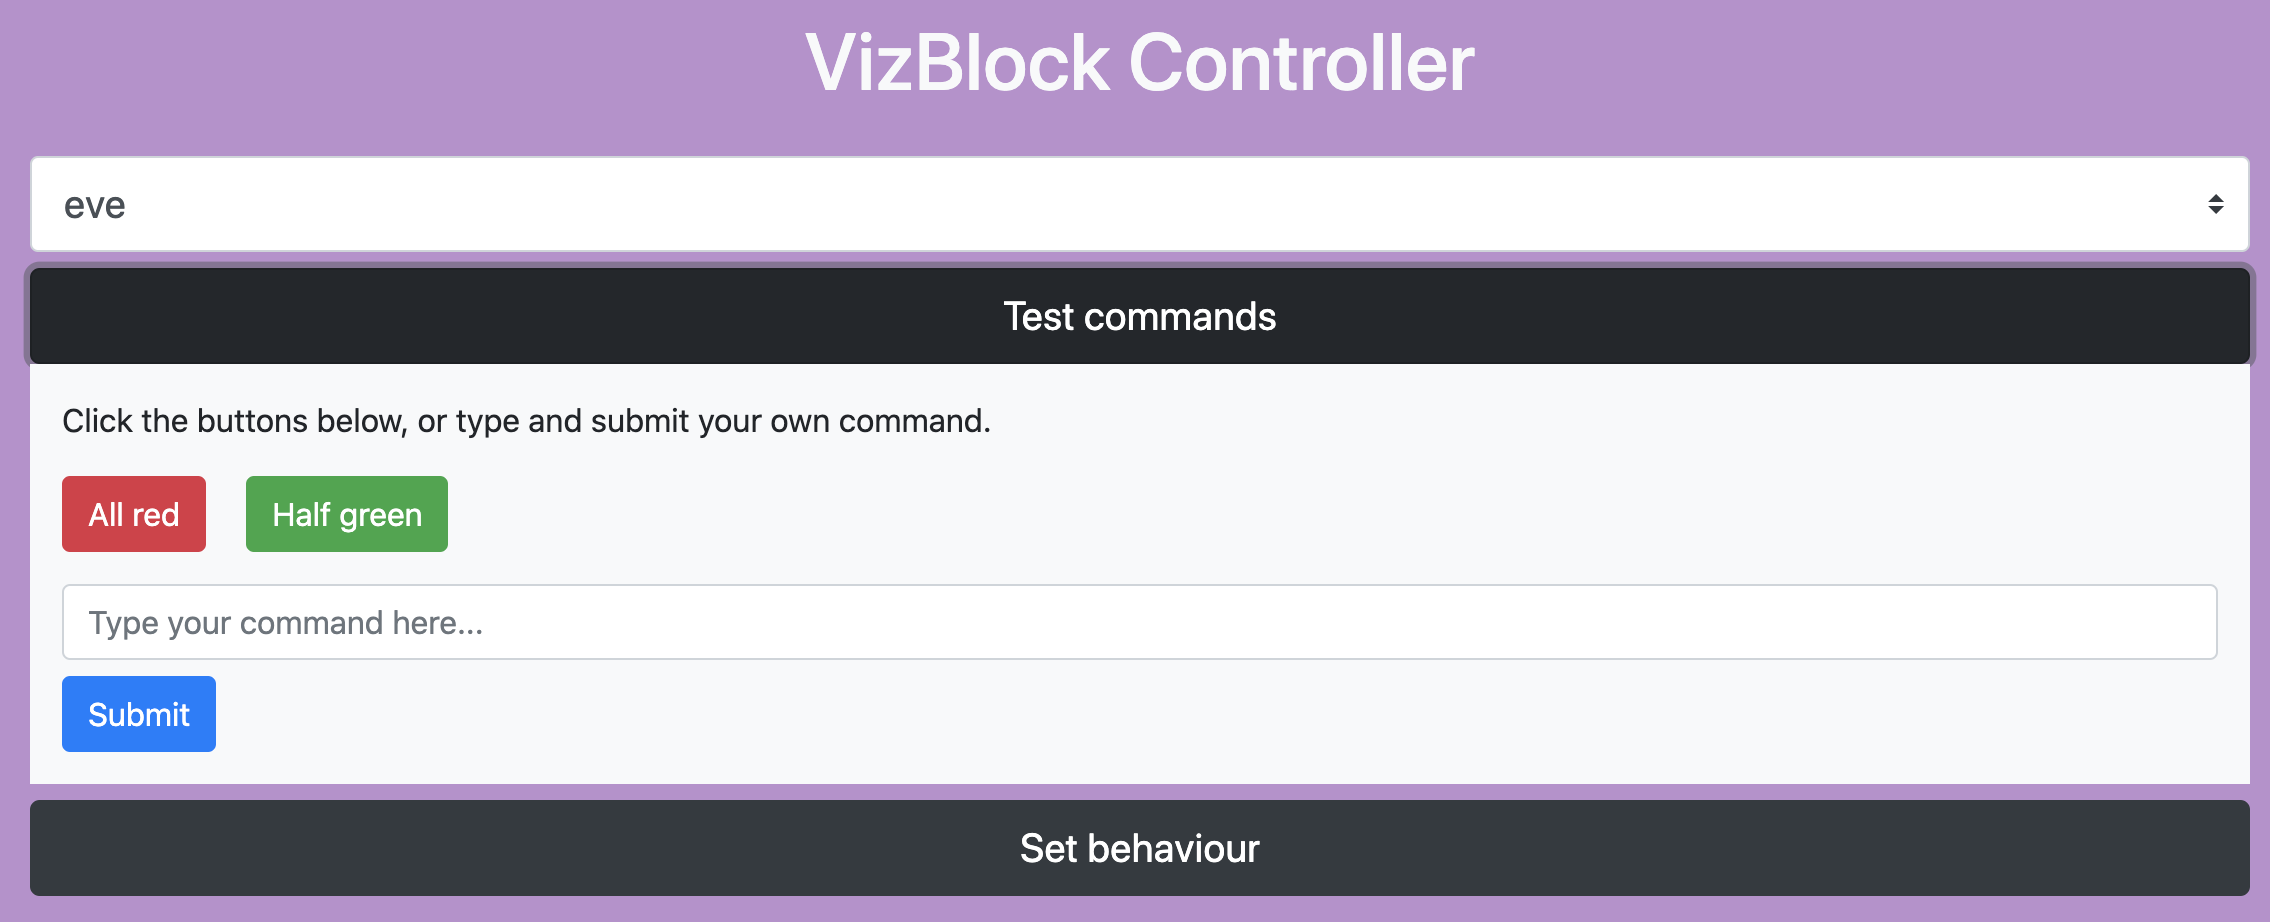
Once a block is selected, you can click Test commands, which allows you to send test commands to your block; or Set behaviour, which lets you decide how your block should respond to happiness or sadness.
Controlling the Blocks with the Face Tracking App
- On a phone or computer (connected to the VizBlocks WiFi network), go to https://192.168.4.1/face-tracker/#1. The #1 at the end or this url specifies that we want this instance of the app to send data as if it was phone number 1. You can change this to whatever number you like, but make sure you go to the admin interface to specify which phone you want to use to control the blocks (Phone 1 is the default).
- Click START! to begin tracking. You should now see the blocks respond to your facial expressions (happy or sad).
Phone numbers are designated by adding #[phone number] at the end of the face tracking url. So to set up a device as phone 1
Controlling the Blocks with Weather Datasets
- On a phone or computer (connected to the VizBlocks WiFi network), go to https://192.168.4.1/face-tracker/dataset.html.
- On the top dropdown menu, select a weather dataset (either Leuchars or London), and then click LOAD DATA.
- Click on a row in the weather data table to send that data to the VizBlock server OR press the play button in the bottom right corner to automatically cycle through the data.
- To view the data on the VizBlock Face, go to the admin interface and select
Datasetas the Data Source for Face 1 and/or Face 2.